My Kitchen Upgrade! Ninja Flip Air Fryer + Toaster Oven Review
- Feb 18, 2025
- 2 min read
Updated: Mar 11, 2025

My old toaster oven was...well, let's just say it wasn't my favourite appliance. It was constantly giving me grief, and frankly, it finally dying gave me the perfect excuse for an upgrade. Plus, my family has grown over the years (from 3 to 4 members), and my trusty air fryer was starting to feel a little cramped. So, if I was going to upgrade my toaster oven I needed something that could do it all!
Enter the Ninja Flip Air Fryer + Toaster Oven. I've owned a few Ninja products with zero issue over the years, including my air fryer and blender, and the idea of combining a toaster oven and air fryer into one space-saving appliance was super appealing. After a bit of research, I decided to take the plunge.
Ninja Flip Unboxing and Setup: My First Impressions
When the box arrived, I was excited to get started. Unboxing was a breeze, and the appliance itself looks sleek and modern. It definitely adds a nice touch to my countertop. Setting it up was pretty straightforward. While I took a few minutes to glance over the manual it's honestly not even necessary for setup, it is that easy.
The "Flip" feature is pretty cool. You can switch between horizontal and vertical positioning simply flipping the appliance on its side when you're finished using it. It's a clever design that saves space for those of us whom counter tops are prime real estate.
Testing It Out: Toast, Chicken Tenders, and Coconut Shrimp!

Of course, the real test was how it performed. First up: toast. I wanted to see if it could deliver that perfect golden brown crispness. And it did! My toast came out evenly toasted, and I was impressed.
Next, I decided to try some air fryer classics: chicken tenders and coconut shrimp. I love that this appliance offers a healthier way to cook fried foods. The chicken tenders were crispy on the outside and juicy on the inside, and the coconut shrimp was perfectly cooked. No more soggy, greasy fried food!
I walked through the basic functions in my video, so you can see exactly how easy it is to use. The controls are intuitive, and I appreciate the pre-set functions for things like air frying, baking, and toasting.
My Honest Thoughts On The Ninja Flip Air Fryer + Toaster Oven
Overall, I'm really happy with the Ninja Flip Air Fryer + Toaster Oven. It's a versatile appliance that does a great job of both toasting, air frying, and more. It's perfect for my family of 4, and it's definitely made my life easier in the kitchen.
Pros:
Space-saving design
Versatile cooking options
Easy to use
Cooks food evenly and quickly
Healthy air frying option
Cons:
Like all air fryers, it can be a bit noisy.
The flip motion takes a bit of getting used to.
If you're looking for a new toaster oven or air fryer, I highly recommend checking out the Ninja Flip. It's a great investment for any kitchen.
What Would You Cook?
I'd love to hear what you'd cook in this appliance! Let me know in the comments below. And don't forget to check out my video for a full unboxing and review!
1
Searing the Beef
Sear beef fillets on high heat for 2 minutes per side to form a golden crust. Let it cool before proceeding to keep the beef tender.
1
Searing the Beef
Sear beef fillets on high heat for 2 minutes per side to form a golden crust. Let it cool before proceeding to keep the beef tender.
1
Searing the Beef
Sear beef fillets on high heat for 2 minutes per side to form a golden crust. Let it cool before proceeding to keep the beef tender.
1
Searing the Beef
Sear beef fillets on high heat for 2 minutes per side to form a golden crust. Let it cool before proceeding to keep the beef tender.
Notes


1
Season the good fresh beef fillets with salt and black pepper. Heat olive oil in a pan over high heat and sear the fillets for 2 minutes per side until it fully browned. Remove the beef from the pan and brush with a thin layer of mustard. Let it cool.
1
Season the good fresh beef fillets with salt and black pepper. Heat olive oil in a pan over high heat and sear the fillets for 2 minutes per side until it fully browned. Remove the beef from the pan and brush with a thin layer of mustard. Let it cool.
1
Season the good fresh beef fillets with salt and black pepper. Heat olive oil in a pan over high heat and sear the fillets for 2 minutes per side until it fully browned. Remove the beef from the pan and brush with a thin layer of mustard. Let it cool.
1
Season the good fresh beef fillets with salt and black pepper. Heat olive oil in a pan over high heat and sear the fillets for 2 minutes per side until it fully browned. Remove the beef from the pan and brush with a thin layer of mustard. Let it cool.
Instructions
Quality Fresh 2 beef fillets ( approximately 14 ounces each )
Quality Fresh 2 beef fillets ( approximately 14 ounces each )
Quality Fresh 2 beef fillets ( approximately 14 ounces each )
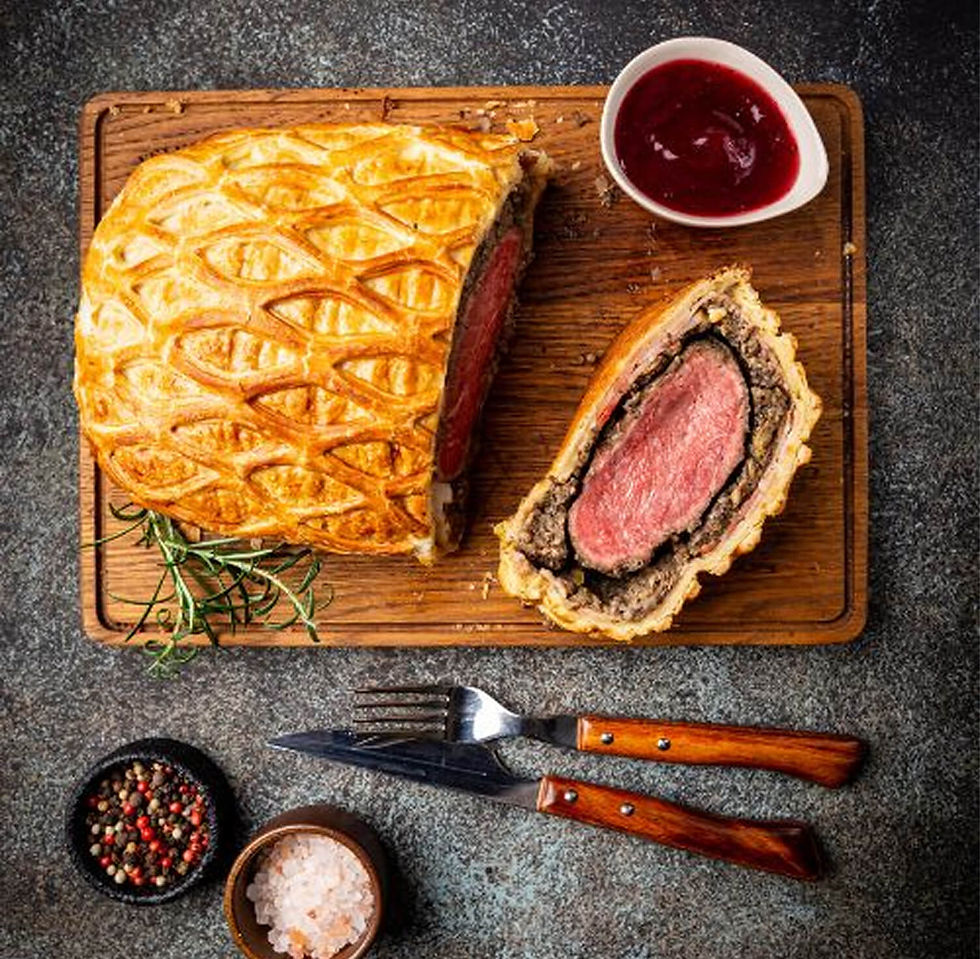
Beef Wellington
Beef Wellington
Fusion Wizard - Rooftop Eatery in Tokyo
Author Name
%20(1).jpg)
Beef Wellington is a luxurious dish featuring tender beef fillet coated with a flavorful mushroom duxelles and wrapped in a golden, flaky puff pastry. Perfect for special occasions, this recipe combines rich flavors and impressive presentation, making it the ultimate centerpiece for any celebration.
Servings :
4 Servings
Calories:
813 calories / Serve
Prep Time
30 mins
Prep Time
30 mins
Prep Time
30 mins
Prep Time
30 mins


Comments